Building @bryceo/me, a TUI for my personal website
December 28, 2025
I've been really interested in finding an excuse to learn more about TUIs and specifically have been wanting to use OpenTUI. Since I have been recently revamping and working on my personal site for fun, I thought it would be interesting to create a TUI to browse information typically found on my personal website.
I had previously created a simple npx command to display "about me" information, but it was aimed at being as lightweight as possible and just getting basic information across. npx @bryceo/me was the original command, and this is what v1 looked like:
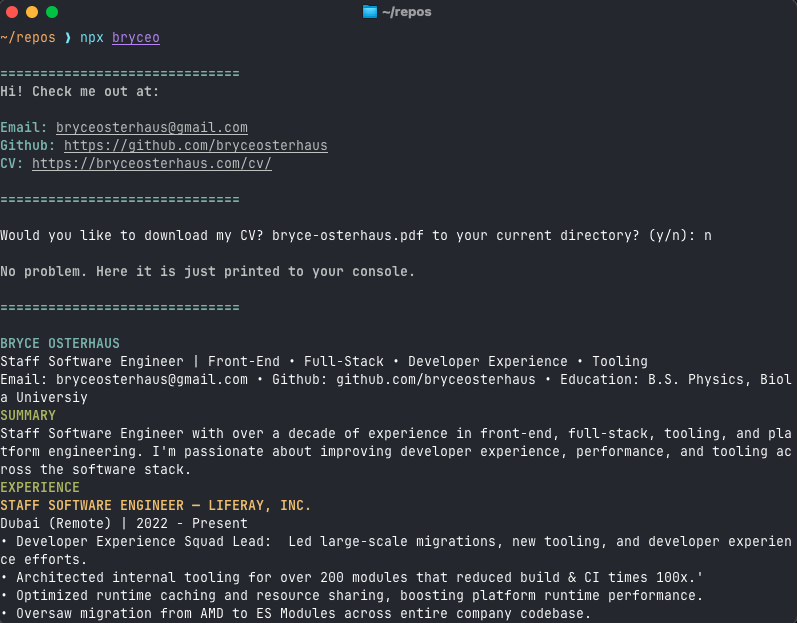
The Plan
v1.0 had a simple interaction of being able to download a PDF of my CV, but I wanted to create more interactions. The features I wanted to add were:
- Navigate to my website, github, and linkedin
- See my CV right there in the terminal
- Ability to send me a message directly from the terminal
- Navigate and read through blogs I have written directly in terminal
The Build
I started out by creating a new project with bun create tui and specifically used @opentui/solid as the render reconciler. SolidJS has also been on my list of technologies to checkout out, so this was a good hybrid case. I was going to have a "menu" screen and then sub-menus or actions for each item in the list. By using SolidJS I could effectively manage the stateful-ness of the app to ensure the appropriate screen was displayed and in sync.
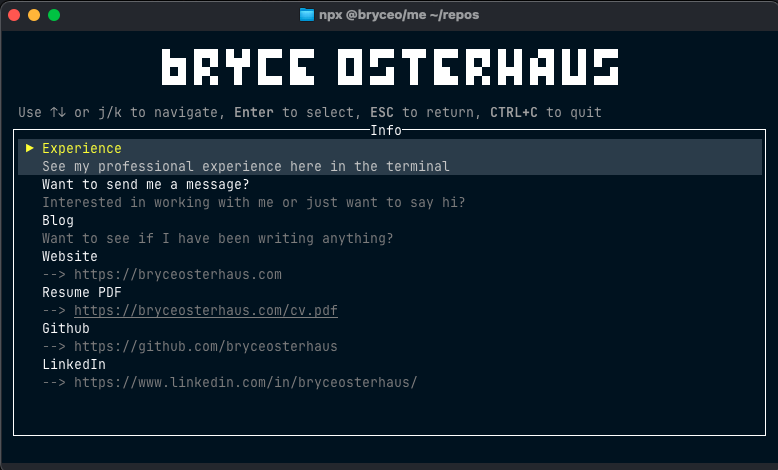
Navigation Menu
First, I needed to start with a menu to navigate a set of options. The first items to do are the basic interactions of opening different URLs was really simple, I used open from sindresorhus for this which I used in a basic onSelect callback function like you'd do in a normal JSX application. No need for separate screens, I can just launch the browser from the main menu.
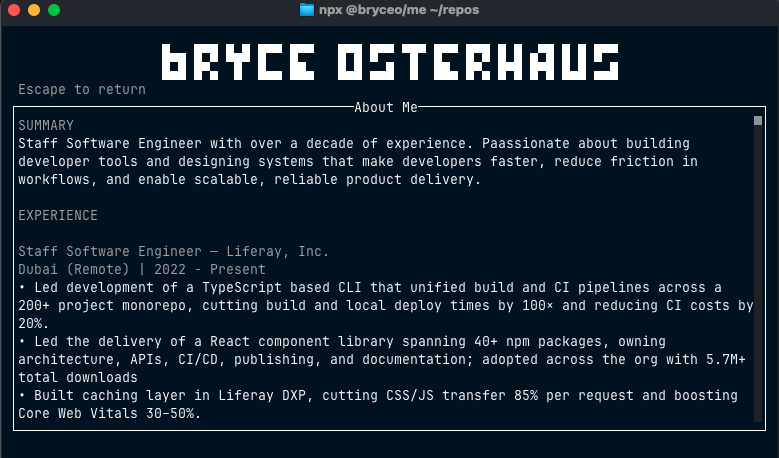
CV
Viewing my CV right in the terminal was also straight forward. Once selected, the application should navigate to a new screen and then I just needed to make sure I could easily take my CV from it's existing source(which is in a yml file) and generate some plain text to render. I also needed to make sure that the text box was scrollable for different view ports.
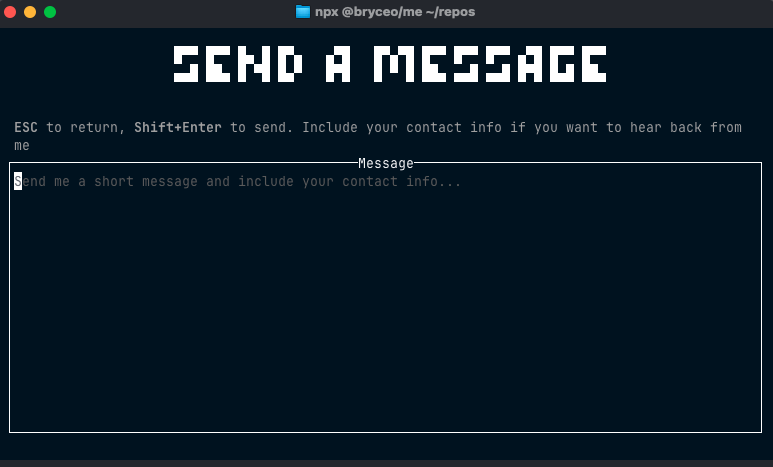
Sending Message
This option brings you to a new screen with a large text area. You can type whatever you want and then when you hit SHIFT + ENTER, it will submit the message. In order to do this, I used Resend(which I also used for Kindle Notes Project). However, I needed to be careful here because this TUI is essentially a fully on the client, meaning I can't just bundle in environment variables or secrets. I took advantage of this learning opportunity to use a Cloudflare Worker. This way I can just have a single HTTP end point I need to call with my application and I can send off an email. So, whenever someone runs this TUI and sends a message, it just emails me the contents of the message.
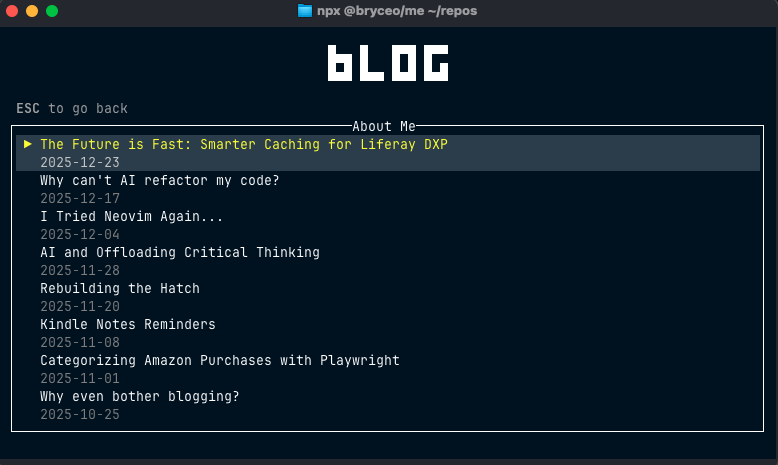
Viewing Blogs
I wanted the ability to see the list of blogs from my site, and navigate into each one and read it. I did this by making a request to fetch all blog content from my website and then I can render the content directly into the TUI. This part is still a bit unpolished, right now when reading a blog you will just see the raw markdown content. Ideally, I want to do a full render of the blog(including images) in the terminal itself. Maybe even find a way to turn the images into ASCII to make it more terminal-like.
Take Away
I worked on this project for only a day or so but I really enjoyed it and I want to take it even further. I'd like to take interact more low-level and directly with the terminal's rendering layer and experimenting with some of the constraints. Specifically I'd like to get blogs to fully render in a comparable format with the bed and even render images. The highlight of this this project is that it allowed me to work with a handful of technologies I don't work with on a daily basis, such as OpenTUI, SolidJS, Cloudflare Workers, and even bun.
Want to try it? Run npx @bryceo/me